Every day, millions of people around the world need to convert PDF files into JPG images. Whether you are a designer extracting graphics from a portfolio PDF, an accountant sharing invoice pages in an email, or a student embedding scanned textbook pages into a presentation, the PDF-to-JPG conversion is a task that keeps coming back. Yet most people approach it without understanding the real differences between methods, formats, and settings that dramatically affect the quality of the final output.
This guide goes far beyond a simple tutorial. By the time you finish reading, you will understand exactly why PDF to JPG conversion works the way it does, which method fits which scenario, how to avoid the most common pitfalls, and what settings make the difference between a sharp, professional-looking image and a blurry mess that nobody wants to share. We cover both browser-based online tools and offline software solutions, comparing them across quality, speed, privacy, and cost so you can make informed decisions every time.

Why Convert PDF to JPG? Understanding the Core Motivation
The PDF format was designed to preserve document layout across any device or operating system. It excels at keeping fonts, spacing, and graphics exactly where the author placed them, which makes PDFs perfect for sharing official documents, contracts, and published materials. However, this very strength becomes a limitation when you need to use document content in contexts where PDF files are not welcome or practical.
JPG images, on the other hand, are universally recognized by every web browser, image viewer, operating system, and mobile application in existence. There is no PDF viewer to install, no scroll interaction to manage, no zoom level to adjust. When you drop a JPG into a presentation slide, embed it in a website, paste it into a messaging app, or attach it to an email, it just works. This universal compatibility is the primary reason most people reach for a PDF-to-JPG converter in the first place.
Beyond simple compatibility, there are situations where rasterizing a PDF into an image format serves a specific functional purpose. Designers sometimes need to extract embedded artwork from PDF files without access to the original source files. Legal teams may need to convert signed PDF contracts into image snapshots for archiving in systems that only accept image formats. Marketing departments often convert multi-page PDF brochures into individual JPG pages for use in social media posts, email campaigns, or digital billboards. Each of these use cases carries slightly different requirements for resolution, quality, color handling, and file size, and understanding those differences will help you choose the right conversion method every single time.
Common Use Cases: Presentations, Invoices, Scanned Documents, and More
Presentations and slide decks are one of the most frequent scenarios for PDF-to-JPG conversion. Many professionals receive PowerPoint or Keynote files as PDFs, especially when sharing via platforms that automatically convert presentation files. Converting each slide to a JPG lets you embed individual frames as images within other documents, websites, or email newsletters without dealing with embedded presentation players or links. A single slide at 1920×1080 pixels converts cleanly at 150 DPI, producing an image that looks sharp on any screen while keeping the file size manageable enough for web use.
Invoices and financial documents represent another major use case. Businesses frequently need to share invoice pages as images in accounting software that does not natively accept PDF attachments, or in email threads where PDF attachments are blocked by security filters. For these situations, converting at 150–200 DPI produces perfectly readable document images at a fraction of the file size of the original PDF. The key here is ensuring text legibility — invoices contain small fonts and table data that can become unreadable if the conversion resolution is set too low.
Scanned documents and photographic PDFs present a unique challenge because they already exist as raster images within the PDF container. When you scan a paper document, the scanner saves the result as an image embedded inside a PDF. Converting this type of PDF back to JPG is essentially a format change rather than a rasterization of vector graphics, which means the quality depends almost entirely on the original scan resolution. A document scanned at 300 DPI will convert to a sharp JPG, while one scanned at 72 DPI will look pixelated and unprofessional regardless of what conversion tool you use.
Graphic design assets extraction is a more specialized use case. PDF files often contain embedded images, illustrations, icons, or photographs that were part of a design project. Extracting these assets as JPG images allows designers to repurpose individual elements without rebuilding them from scratch. This use case benefits greatly from high-resolution conversion settings and careful attention to color management to preserve the visual quality of the original artwork.
Online vs Offline Methods: A Comprehensive Comparison
Browser-based online converters have become the dominant way most people convert PDFs to JPG images, and for good reason. These tools require no software installation, work on any device with a web browser, and eliminate the need to download and maintain desktop applications. For occasional users who convert a handful of files per month, online tools offer unbeatable convenience. You open the website, upload your PDF, adjust a few settings if needed, and download your JPG images within seconds.
However, online converters vary enormously in quality, privacy practices, and feature sets. Some services run entirely in your browser using JavaScript processing, which means your PDF files never leave your device at all. Our PDF to JPG converter operates on this principle — the conversion happens locally in your browser tab, and the files you upload are never transmitted to any server. This approach is ideal for sensitive business documents, personal records, or anything you would rather not send to a third-party service.
Other online converters upload your files to their servers for processing, which introduces both privacy concerns and practical limitations. Server-side processing means your documents travel across the internet and sit on someone else’s infrastructure, potentially for minutes or hours before you download the result. Many corporate privacy policies explicitly prohibit uploading confidential documents to external services, and legally sensitive materials like contracts or medical records should generally not be processed on servers you do not control. Additionally, server-side services often impose file size limits, restrict the number of pages you can convert, and may charge fees for higher usage volumes.
Offline methods using desktop software give you complete control over every aspect of the conversion process. Adobe Acrobat remains the industry standard for PDF manipulation, offering precise control over output resolution, color management, and compression settings. Its export function lets you choose the exact DPI, color space, and JPG quality level you need. macOS users can take advantage of Preview, the built-in application, which supports PDF-to-image export through a straightforward File menu operation that requires no additional software at all.
For users who need to process large numbers of PDFs regularly, command-line tools offer the most powerful and automatable approach. ImageMagick is a free, open-source image manipulation toolkit that converts PDFs to JPGs through terminal commands. You can specify exact DPI values, batch-process entire directories of PDFs, and integrate the conversion into larger automated workflows. The trade-off is a steeper learning curve — command-line tools require some technical familiarity and are less intuitive than graphical interfaces. However, for power users who need to convert hundreds of PDFs on a regular schedule, the efficiency gains are substantial and worth the initial setup investment.
DPI and Resolution: Getting the Numbers Right
Understanding DPI (dots per inch) is perhaps the single most important factor in achieving good PDF-to-JPG conversion results, yet it is also the most frequently misunderstood. DPI determines how many pixels the converter creates per inch of the original document. A PDF designed for screen display at 72 DPI will produce relatively small image files when converted at that same resolution. A PDF designed for print at 300 DPI will produce large, detailed images when converted at full resolution.
For web use and screen display, converting at 72–150 DPI produces images that look sharp on standard monitors and retina screens without unnecessarily bloating file sizes. A standard A4 page converted at 150 DPI typically yields an image around 1750×2480 pixels, which covers most web display needs perfectly. Uploading images significantly larger than necessary wastes bandwidth and slows page load times, which is particularly relevant if you are converting PDFs for use on your own website.
For print-quality output, you need at least 300 DPI, and for high-quality print reproduction, 600 DPI is preferable. This means a single A4 page at 300 DPI produces a roughly 3500×4960 pixel image — a large file, but necessary for professional printing where every pixel matters. If you convert a PDF that was originally created at 72 DPI (a screen-resolution document) at 300 DPI, the converter will simply upscale the low-resolution content, creating a large file that is not actually sharper than the original. The quality is fundamentally limited by the source material, not the conversion settings.
The aspect ratio and page dimensions of your PDF also affect the output. Most converter tools will either preserve the original PDF dimensions or scale to a standard image size. Always check whether your tool produces the dimensions you expect before processing important documents. Some tools add margins or padding that alter the final image proportions, which can cause alignment issues in presentations or publications.

Single-Page vs Multi-Page PDF Conversion
PDF files can contain anywhere from one page to thousands of pages, and how you handle multi-page documents depends entirely on your intended use. Most converters give you two fundamental choices: convert all pages into individual JPG files, or combine them into a single continuous image or a multi-image archive. Understanding the difference and choosing correctly for your workflow saves significant time and frustration.
Individual JPG files per page is the most common approach and works well for most use cases. Each page becomes its own image file named sequentially (page-001.jpg, page-002.jpg, and so on). This format is ideal for presentations where you need one slide per image, for social media posts where you want to share individual pages, and for document management systems that require one file per page. The main consideration is organizing the output — with a 200-page PDF, you will end up with 200 separate image files that need naming and folder organization.
Some converters offer the option to combine all pages into a single long image (sometimes called a “digital negative” or “contact sheet”), which is useful for proofing, archiving, or visual review purposes. This approach produces one file to manage instead of dozens, but creates unwieldy images for any practical application where individual page access is needed.
Zip archive output is a practical middle ground that many professional tools support. Instead of downloading 50 separate JPG files, you download a single ZIP archive containing all the individual page images. This simplifies the download and sharing process while preserving the individual file structure you need for downstream use. Our browser-based PDF converter provides this functionality, letting you download all pages as individual files or as a convenient archive depending on your needs.
JPG Quality Settings and Compression Trade-offs
JPG format uses lossy compression, which means every time you save an image as a JPG, some visual information is permanently discarded in exchange for smaller file sizes. Understanding how quality settings affect this trade-off is essential for getting results that balance visual fidelity against practical file size constraints.
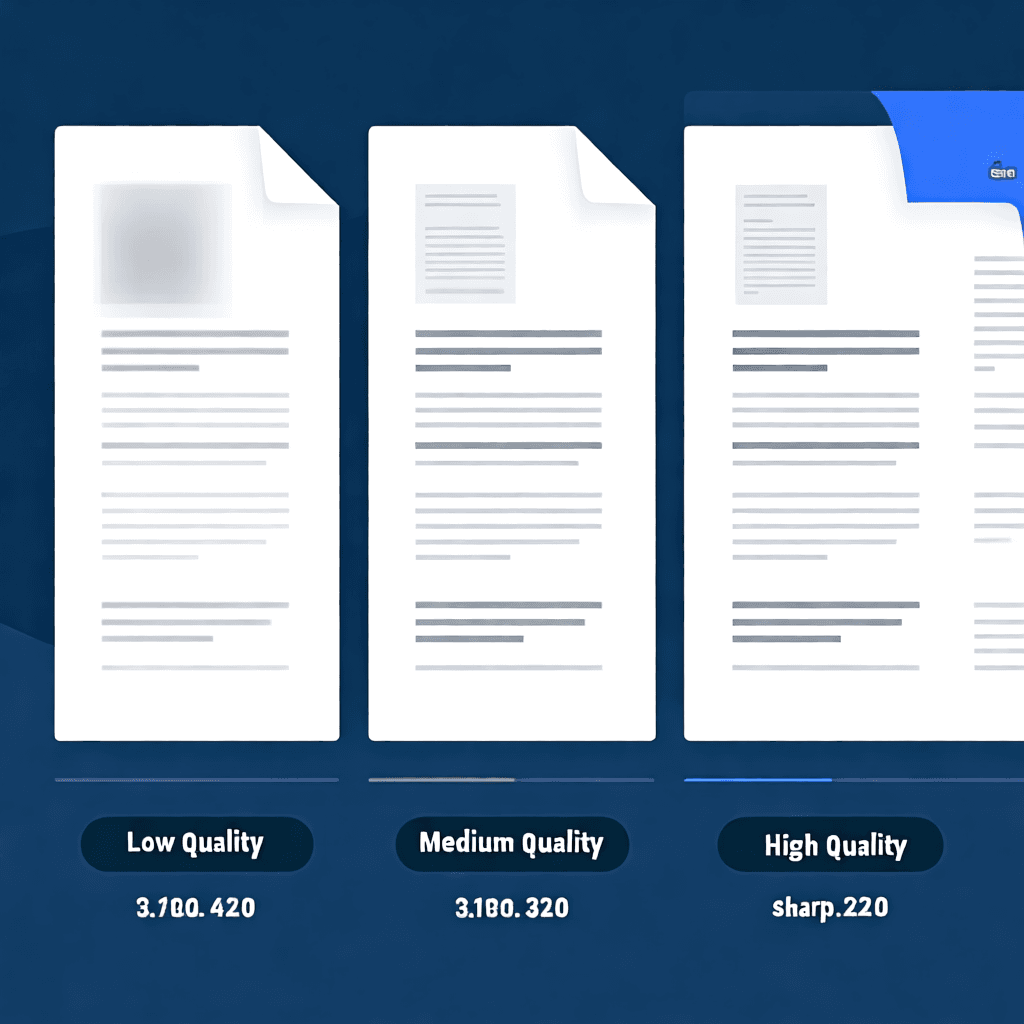
Most converters offer quality settings on a scale from 1 to 100, or with descriptive labels like Low, Medium, High, and Maximum. At quality levels above 90, the compression artifacts are imperceptible to the human eye for most images. Files at this level are roughly 30–50% smaller than an uncompressed equivalent, which represents a meaningful saving for web use without any visible quality loss on most content types. For text-heavy documents, however, even subtle compression can introduce visible artifacts around letter edges, which is why document images often benefit from higher quality settings than photographic content.
At medium quality levels (60–80), compression artifacts become visible, particularly in areas of fine detail, gradients, and text. You will notice slight “blocking” or blurring in areas that should have sharp transitions. For casual sharing where exact text legibility is not critical, these levels may be perfectly acceptable. For professional documents, invoices, contracts, or anything where text clarity matters, stay above 85% quality.
Low quality settings below 60 produce images that look obviously compressed and degraded. Colors may appear washed out, edges become noticeably fuzzy, and fine text becomes difficult or impossible to read. These settings are generally unsuitable for any professional or functional purpose. However, they can be appropriate for generating small thumbnails or previews where file size is paramount and visual fidelity is irrelevant.
Privacy and Security: Protecting Your Documents During Conversion
Document privacy is an issue that receives far too little attention in most discussions of PDF-to-JPG conversion, yet the implications can be serious. When you upload a PDF to an online converter, you are placing a copy of that document on someone else’s servers, at least temporarily. Depending on the service, this copy may be stored for minutes, hours, days, or indefinitely. Anyone with access to those servers — whether a company employee, a hacker who compromises the system, or a government agency with legal authority — could potentially access your documents.
For everyday documents like vacation photos or casual personal files, this risk is negligible and not worth worrying about. But for business documents containing financial data, client information, legally privileged communications, medical records, or any sensitive personal information, uploading to third-party servers is a decision that deserves careful consideration. Many industries have data protection regulations — including GDPR in Europe, HIPAA in the United States for health information, and various industry-specific requirements — that may prohibit or restrict uploading certain types of documents to external services.
Browser-based local processing solves this problem at its root. When a tool processes your PDF entirely within your web browser using JavaScript and the Canvas API, the file never leaves your device. The PDF stays on your computer or phone, gets processed in your browser’s memory, and the resulting JPG image is created locally before you upload it anywhere. This approach provides privacy guarantees that no server-side service can match, regardless of their privacy policies or encryption standards.
Offline desktop software also keeps your documents entirely within your own environment. A PDF converted using Adobe Acrobat on your local computer, or processed through ImageMagick on your own server, never touches an external service. For organizations with strict data governance requirements, this local processing approach is typically the only acceptable option, and the tools that support it range from commercial products like Adobe Acrobat to free open-source alternatives like GIMP and Inkscape.
Alternatives to JPG: PNG, WEBP, and When to Use Them
While JPG is the most popular output format for PDF conversion, it is not always the best choice. Understanding the alternatives helps you pick the right format for each specific use case, and sometimes the decision between formats has a larger impact on your results than the choice between online and offline tools.
PNG format uses lossless compression, which means no image quality is lost when saving. Text appears sharper, edges are cleaner, and gradients render more smoothly than with JPG compression. For documents that contain text, diagrams, charts, or any content where visual fidelity matters more than file size, PNG is often the better choice. The downside is significantly larger file sizes — a PNG converted from a text-heavy PDF page may be 3–10 times larger than the equivalent JPG at high quality. PNG is ideal for archival purposes, professional print layouts, and any situation where you will be editing or re-processing the image later.
WEBP format is a newer standard developed by Google that offers both lossy and lossless compression options in a single format. WEBP files are typically 25–35% smaller than equivalent JPG images at similar quality levels, which makes them excellent for web use where page speed matters. However, WEBP has less universal support than JPG — while all modern browsers handle WEBP well, some older software and legacy systems do not. If you are converting PDFs for use on the modern web, WEBP deserves serious consideration. You can learn more about WEBP and other format options in our comprehensive PNG vs JPG comparison guide.
TIFF format is another lossless option popular in professional publishing and archival workflows. TIFF files support high bit depths, multiple color spaces, and can be edited in professional graphics software without quality degradation. For high-end print production, legal archiving, or any scenario where you need to preserve every pixel of detail without compression artifacts, TIFF is the professional standard. However, TIFF files are typically larger than even PNG and have no native browser support, making them unsuitable for web use.
The choice between formats ultimately comes down to your intended use. For web display, JPG or WEBP at high quality serves most purposes. For document sharing where text sharpness is critical, PNG preserves the clarity you need. For professional print or archival purposes, TIFF or high-quality PNG ensures no quality loss. Our image compression guide covers strategies for reducing file sizes across all formats without unacceptable quality loss.
Batch Conversion: Processing Multiple PDFs Efficiently
Converting a single PDF to JPG is trivial with any tool. Converting fifty PDFs efficiently requires a more thoughtful approach. Batch conversion capabilities vary significantly between tools, and choosing the right approach for your volume of work can save hours of manual effort.
Online batch processing is available on many web-based converters and typically allows you to upload multiple PDF files simultaneously, process them in a queue, and download all results as a ZIP archive or individual files. This approach works well for moderate volumes (dozens of files) and requires no technical setup. The main limitations are upload speed, server processing time, and any per-file or per-volume restrictions the service imposes. Some services throttle batch uploads, process only the first few pages of each file in free tiers, or charge premium fees for batch processing.
Desktop software with batch capabilities is the most efficient option for high-volume conversion. ImageMagick running from a script can process entire folders of PDFs automatically, applying consistent settings to every file, organizing output into subfolders, and logging the results for verification. A simple bash loop with ImageMagick can convert hundreds of PDFs overnight while you focus on other work. The initial script setup takes some time, but the automation pays dividends when the same conversion task needs to be repeated.
For intermediate volumes, some desktop applications like Adobe Acrobat support batch processing through built-in Action Wizard features. These let you define a conversion workflow once, save it as a reusable action, and apply it to any number of files with a single click. This approach combines the consistency and privacy of offline processing with the convenience of batch automation, making it a popular choice for professionals who regularly process document batches but do not want to write code.
Troubleshooting Common PDF to JPG Conversion Problems
Despite the apparent simplicity of the conversion process, things go wrong more often than most users expect. Understanding the most common problems and their solutions will save you significant frustration and help you diagnose issues quickly when they arise.
Blurry or unreadable text is the most frequent complaint about PDF-to-JPG conversion. The root cause is almost always insufficient DPI settings. If your output text looks fuzzy, increase the resolution to at least 150 DPI for screen use or 300 DPI for print. If the PDF was originally created from a low-resolution source (a web page saved as PDF, for example), no conversion setting can improve the underlying quality — you are limited by the source material. In these cases, the best approach is to find a higher-quality version of the original document.
Missing pages or truncated output can occur when the converter runs out of memory, hits a page limit, or encounters an unsupported PDF feature. Very large PDFs with hundreds of pages can strain browser memory limits in online tools, causing crashes or incomplete processing. Offline tools handle large files more gracefully, but extremely complex PDFs with embedded multimedia, 3D content, or unusual encoding can still cause issues. If a specific page fails to convert, try processing that page separately or using a different tool that handles the particular feature causing the problem.
Incorrect colors or color shifts usually indicate a mismatch between the PDF’s color profile and the output format. PDFs can be created in RGB, CMYK, or specialized color spaces depending on their intended use. JPG images are typically output in sRGB, which is the standard for web and screen display. Converting a CMYK PDF designed for print to an RGB JPG can produce colors that look muted, oversaturated, or noticeably different from the original. For color-critical work, use a tool that preserves or correctly converts color profiles, or convert to PNG which handles color management more robustly.
Unsupported PDF format errors occur when the PDF uses features or encryption that the converter does not support. Password-protected PDFs require the password before conversion can proceed. PDFs created with specialized software that uses non-standard encoding may not convert cleanly in general-purpose tools. In these situations, you need the original software or a professional PDF tool like Adobe Acrobat that supports a broader range of PDF features. Some older PDF versions (PDF/X standards for print, for example) have specific requirements that general converters cannot handle.
Best Practices for Different Document Types
Not all PDFs are created equal, and treating every document type the same way will produce suboptimal results. Adapting your conversion approach to the specific document type yields significantly better outcomes with minimal extra effort.
Text-heavy documents like reports, contracts, and articles benefit most from high-quality JPG output at 150–200 DPI minimum. The text needs to remain crisp and legible, and any compression artifacts on letter edges are immediately visible and distracting. PNG is actually preferable for this type of content when file size is not a concern, since the lossless compression preserves text sharpness perfectly across multiple save cycles.
Photographic PDFs — whether they contain scanned photos, image-heavy magazine layouts, or design portfolios — can usually tolerate JPG compression at 80–85% quality without visible artifacts. These files are typically large, so the file size savings from compression are valuable, and the slight quality reduction is imperceptible in photographic content. Converting at 150 DPI is usually sufficient since photographic detail does not require the 300 DPI needed for print text.
Mixed content PDFs containing both text and images are the most challenging to convert optimally. A single quality setting cannot serve both needs perfectly. For these documents, consider whether your primary use case is text legibility or image quality, and optimize for the more critical factor. Alternatively, use a tool that lets you apply different quality settings to different page elements, which professional software like Adobe Acrobat supports.
Vector graphics PDFs from design software like Illustrator, InDesign, or CAD programs contain mathematically defined shapes rather than pixel data. Converting these to JPG rasterizes the vectors into pixels, which means the output quality depends entirely on your chosen DPI setting. For vector content destined for web use, 150 DPI is sufficient. For any print application, 300 DPI is the minimum, and you may want to export directly from the original design software to a raster format rather than going through PDF as an intermediate step, which preserves maximum flexibility.
Frequently Asked Questions
Does PDF to JPG conversion lose quality?
Yes, converting from PDF to JPG inherently involves quality trade-offs because JPG uses lossy compression. However, the degree of quality loss depends on your settings. At high quality levels (85% and above), the visual degradation is imperceptible for most content types. The rasterization process itself — converting vector graphics and text to a pixel grid — also represents a fundamental change where infinite-resolution vector content becomes a fixed pixel image. For print-quality results, use 300+ DPI and high JPG quality settings or choose PNG instead to avoid compression artifacts.
Can I convert only specific pages from a multi-page PDF?
Most conversion tools let you select a page range or even individual pages rather than converting the entire document. In Adobe Acrobat, you can specify exact page ranges in the Export dialog. Many online converters provide an interface to select which pages to include in the output. Command-line tools like ImageMagick support page range notation (such as file.pdf[0-4] for pages 0 through 4). This selective approach is useful when you only need a few pages from a large document and want to avoid processing overhead or receiving more files than you need.
Are online PDF converters safe for sensitive documents?
It depends entirely on the tool and how it processes your files. Browser-based tools that use local JavaScript processing keep your documents entirely on your device and are safe for sensitive materials. Server-side tools that upload your PDF to external servers for processing introduce privacy risks that vary by service. Always review the service’s privacy policy, check where their servers are located, and understand their data retention practices before uploading anything sensitive. For legally privileged, medically confidential, or commercially sensitive documents, only use tools that process files locally on your own hardware.
Why does my converted text look blurry even at high resolution?
There are several possible causes for blurry text in converted output. First, check that you are setting the DPI correctly — some tools default to 72 DPI which is insufficient for sharp text on modern high-DPI displays. Second, the source PDF may have been created from low-resolution content (a scanned document at low DPI, a web page saved as PDF, or a PDF with embedded low-resolution images), which limits the quality regardless of your conversion settings. Third, certain PDF rendering engines in conversion tools handle text rendering differently; trying a different tool can sometimes produce noticeably sharper results from the same source file. Fourth, compression settings that are too aggressive introduce artifacts that blur text edges.
What is the best DPI setting for converting PDFs?
The optimal DPI depends on your intended use. For screen display on monitors and mobile devices, 72–150 DPI is sufficient; 150 DPI provides extra crispness on high-DPI displays without excessive file sizes. For standard office printing, 150–200 DPI works well. For professional print output that must look sharp at physical size, 300 DPI minimum is required. For high-quality book or magazine printing, 600 DPI may be necessary. Remember that converting a low-resolution PDF at a high DPI does not improve quality — you are only increasing the file size of a blurry image. The output quality is always bounded by the quality of the source document.
Can I convert scanned PDFs to JPG?
Yes, scanned PDFs convert to JPG just like any other PDF. The output quality depends almost entirely on the original scan resolution. A document scanned at 300 DPI will produce sharp, readable JPG images at your chosen output DPI. A document scanned at 72 DPI will produce pixelated, low-quality output that no conversion setting can fix. If you are working with old scanned documents that need enhancement, consider using image editing software to upscale and sharpen the scanned images after conversion, which can partially compensate for low-quality source scans. For future scanning needs, always use the highest practical resolution — 300 DPI for text documents and 600 DPI or higher for documents with fine detail or small text.
How do I convert PDF to JPG on a Mac without additional software?
macOS includes built-in PDF conversion capabilities through Preview, the default application for opening PDFs. Open your PDF in Preview, select File > Export, and choose JPEG as the format from the Quartz filter dropdown. You can adjust the quality slider and DPI setting before exporting. This method works for single-page conversions. For multi-page PDFs where you want each page as a separate JPG, you will need to export each page individually or use a batch processing approach through Automator or a third-party tool. Preview’s export function produces clean, reliable results for most document types without requiring any additional software installation.
What is the difference between exporting from PDF and converting from PDF?
In practical terms, “exporting” and “converting” from PDF to JPG refer to the same process — transforming a PDF file into a JPG image. The terminology varies by software. Adobe applications typically use “Export” to describe the process of saving a PDF into another format with specific settings. Other tools use “Convert” to describe the same operation. There is no technical difference in the outcome; both terms describe the process of rasterizing PDF content into a JPG image file. The quality of the output depends on the tool’s rendering engine and your settings, not the terminology used to describe the operation.
Summary and Recommendation
PDF to JPG conversion is a deceptively deep topic that rewards understanding over blindly clicking buttons. The key insight is that every choice — online versus offline, high DPI versus low DPI, JPG versus PNG, lossy versus lossless — involves trade-offs between quality, file size, privacy, and convenience. Knowing what matters most for your specific use case lets you make those trade-offs deliberately rather than accidentally.
For most everyday users, a browser-based local converter like our PDF to JPG tool provides the best balance of convenience, quality, and privacy. It requires no software installation, works on any device, and keeps your documents entirely within your browser. For professional users with specific quality requirements, large document batches, or strict privacy policies, desktop software like Adobe Acrobat or command-line tools like ImageMagick offer the control and automation you need. For print professionals, TIFF output at 300+ DPI remains the gold standard, while web-focused workflows benefit from the superior compression of WEBP format.
The most common mistakes — blurry text, unnecessarily large files, privacy exposure — are all avoidable with the right knowledge. Now that you understand DPI settings, quality trade-offs, format choices, and privacy implications, you can approach every PDF-to-JPG conversion with confidence and produce results that meet your actual needs instead of settling for whatever the default settings produce.