There is a quiet productivity killer lurking in every creative workflow: the one-by-one image resize. Whether you are a photographer preparing a gallery for client delivery, an e-commerce store owner updating 200 product photos, or a social media manager preparing content for six different platforms, resizing images individually is a task that should have been automated decades ago. Fortunately, it now has been — and you do not need to spend a cent on software subscriptions to do it right.
This guide walks you through batch image resizing done properly: why it matters, how browser-based tools have matured into genuinely powerful alternatives to desktop software, what workflows actually work in practice, and how to avoid the common mistakes that cost people time and image quality. By the end, you will have a clear system for handling any bulk image resizing job quickly, consistently, and without installing anything on your computer.
Why Batch Resizing Is Not Just a Convenience — It Is a Necessity
Let us do some quick math to illustrate the scale of the problem. Imagine you run a small e-commerce store with 150 product photos. Each photo needs to be resized for your website (800×800 pixels), a mobile app (400×400), Instagram (1080×1080), and a promotional email (600×400). That is 600 individual resize operations if you do them manually. Even at just two minutes per image — which is optimistic when you include saving, naming, and checking the output — that is 1,200 minutes, or 20 hours of repetitive work. Batch processing compresses that to a matter of minutes.
Beyond raw time savings, consistency is a major driver. A product catalog where every image is exactly 800×800 pixels looks professional and trustworthy. A catalog where images are 780×783, 820×801, and 795×798 creates an impression of sloppiness before the customer even reads a product description. Batch resizing enforces uniformity across your entire image library in a way that manual processing simply cannot match, no matter how careful you are. Human error accumulates over large datasets, and the larger your image set, the more important automation becomes.
There is also a less obvious but equally important benefit: reduced cognitive load. Every decision you make during a repetitive task — should this be 800 or 850 wide? JPEG at 80% or 85% quality? — consumes mental energy that could be spent on creative or strategic work. Batch processing removes those micro-decisions entirely. You set your parameters once, and the tool applies them thousands of times without drift or fatigue.
Browser-Based Tools vs. Desktop Software: The Modern Reality
For years, the conventional wisdom was that serious image work required desktop software. Adobe Photoshop, GIMP, Affinity Photo — these were the tools professionals used, and anything else was considered a compromise. That wisdom is now significantly outdated for a specific and important use case: batch resizing of existing images.
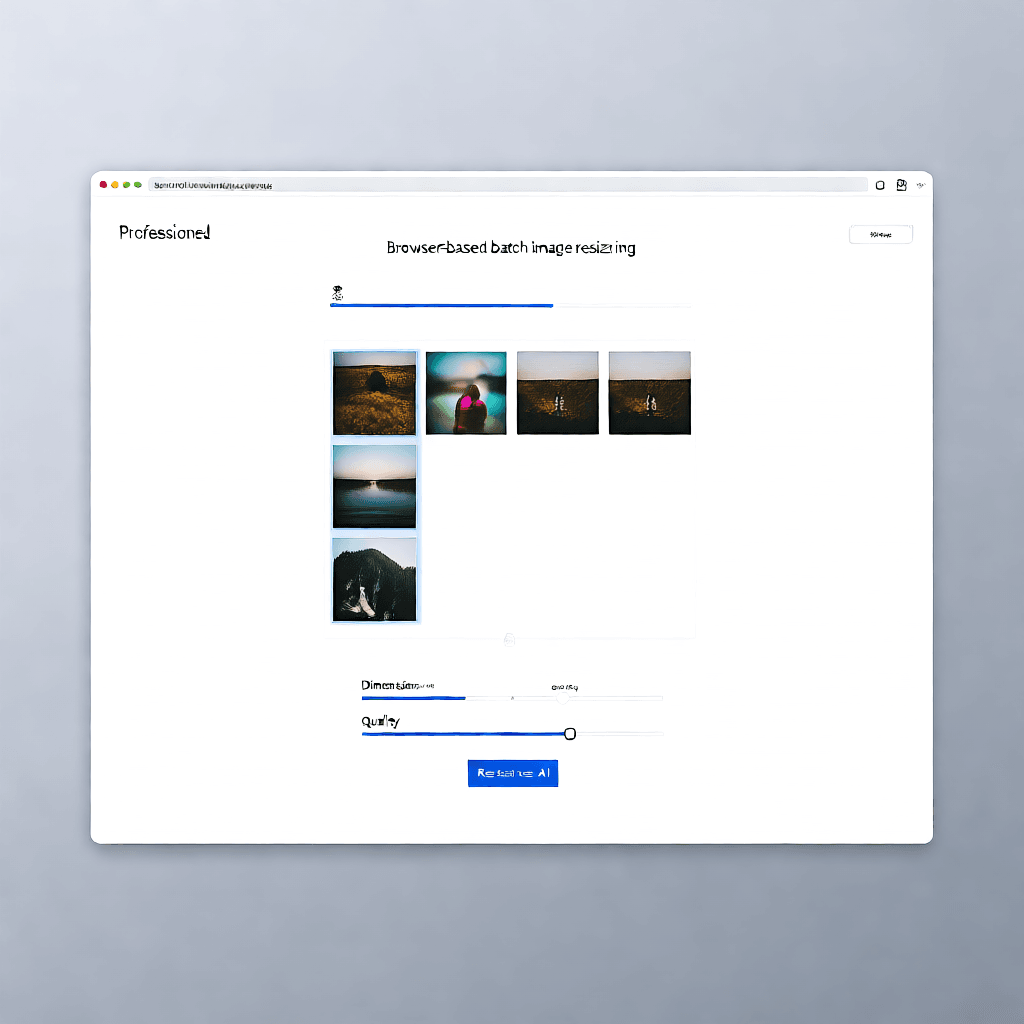
Browser-based tools like ZizzleUp’s batch image resizing tool have matured considerably. Modern browsers have access to powerful image processing APIs that can handle the vast majority of resizing tasks without any server-side processing. The Canvas API in JavaScript, for example, allows browsers to resize images with high fidelity, applying the same interpolation algorithms that desktop software uses. When you resize an image in a browser-based tool, the processing happens on your device — your images never leave your computer unless you explicitly choose a cloud processing option.
Desktop software still has its place for advanced editing, compositing, color grading, and working with layers. But for pure resizing — changing dimensions, adjusting quality, converting formats — browser tools are now a genuine equal to their desktop counterparts in almost every way that matters for most users. The advantages are substantial: no software to install, no updates to manage, works on any operating system, and no licensing fees. An increasing number of photographers and small businesses have made the full switch for routine image processing tasks.
The privacy angle deserves special mention. When you use a browser-based tool that processes images locally, your photos never travel to a remote server. This matters enormously for business documents, medical imagery, confidential creative assets, or any other sensitive material. Even if a cloud-based tool claims it deletes your images after processing, you are placing trust in a company policy rather than a technical guarantee. Client-side processing eliminates that entire class of risk.
Common Use Cases Where Batch Resizing Saves Hours
E-commerce Product Photography
Online retailers face a relentless need for consistent product imagery. Most major e-commerce platforms specify exact image dimensions for listings — Shopify recommends 2048×2048 for the main product image, while Amazon demands at least 1000 pixels on the longest side for zoom functionality. Uploading 3000×3000 pixel original photos directly to your store slows down page load times, damages your Core Web Vitals scores, and creates a poor mobile shopping experience. Batch resizing lets you prepare images at exactly the right specifications for each platform in one operation, then repeat the process when you add new products.
Beyond dimensions, e-commerce image preparation often requires additional consistency: standardizing background colors, applying watermarks, or converting to a specific format (typically JPEG for product photos). Some batch resizing tools, including ZizzleUp’s compression tools, let you chain resizing with compression and format conversion in a single workflow, producing web-optimized images that load fast and look great.
Social Media Content Preparation
Social media managers are among the biggest beneficiaries of batch image resizing. Each major platform has its own preferred image dimensions, and these dimensions change with alarming frequency. Facebook’s link previews, Instagram posts, Twitter headers, LinkedIn articles, Pinterest pins, YouTube thumbnails — each requires a different aspect ratio and resolution. Creating all of these from a master image manually is tedious; batch processing turns it into an automated pipeline.
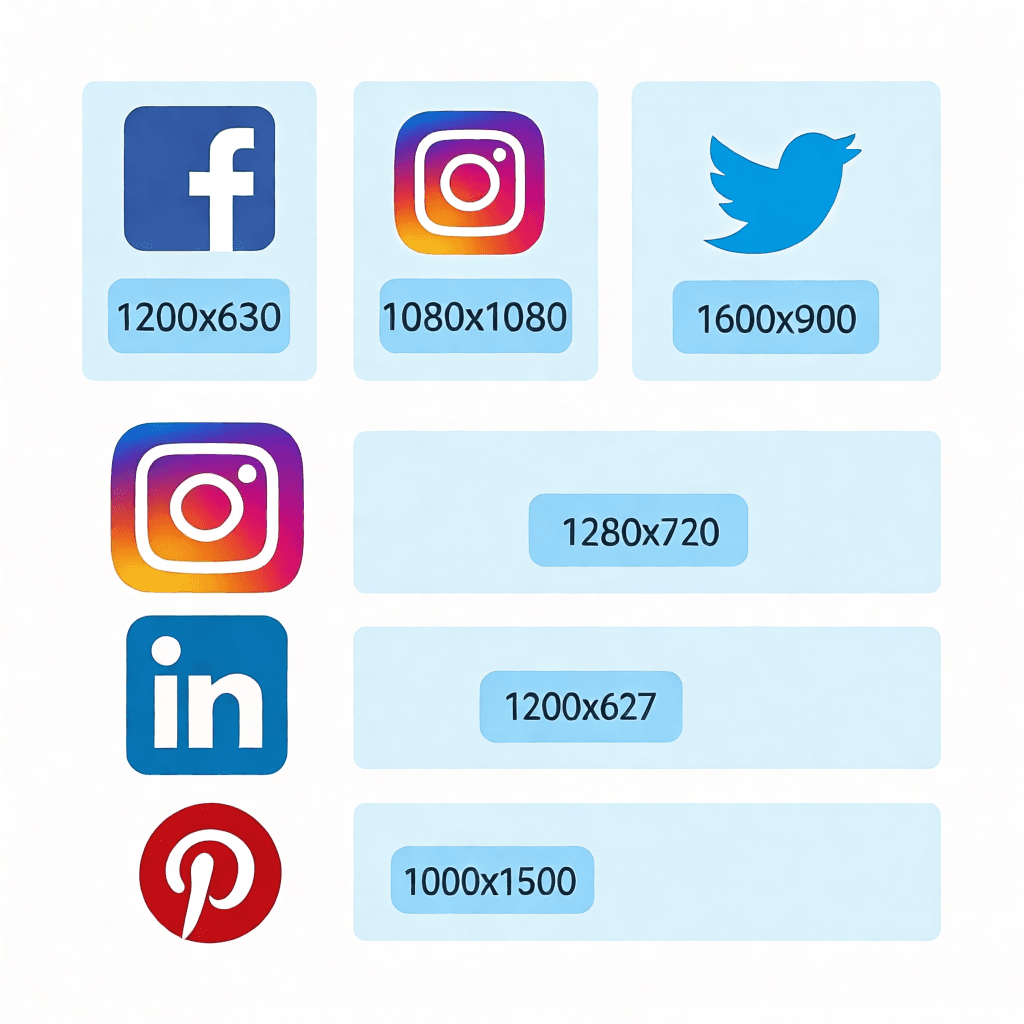
Here are the key dimensions to know for major platforms as of 2024: Facebook shared images work best at 1200×630 pixels, while Instagram posts are ideally 1080×1080 (square) or 1080×1350 (portrait). Twitter recommendations are 1600×900, LinkedIn shared images should be 1200×627, and YouTube thumbnails are 1280×720. Pinterest pins work at 1000×1500. Rather than looking these up and entering them manually each time, a good batch resizing tool with preset dimensions saves enormous repetition.
Website Performance Optimization
Page speed is a critical factor for both user experience and search engine rankings. Google uses Core Web Vitals as ranking signals, and Largest Contentful Paint (LCP) — which measures how quickly the main content of a page loads — is directly impacted by image file sizes. A 4-megabyte hero image on a landing page can add seconds to load time, driving away visitors and hurting your search rankings.
Batch resizing allows website owners to create multiple sizes of each image: a full-resolution version for desktop, a medium version for tablets, and a smaller version for mobile devices. Modern websites use responsive images with the srcset attribute to automatically serve the appropriate size based on the visitor’s screen. Preparing these multiple versions from your original images is a perfect batch resizing task — you define your target dimensions once, run the batch, and have all the files you need for a fast, responsive website.
Archival and Document Management
Organizations that work with large volumes of scanned documents, legal paperwork, or visual records often need to reduce file sizes for long-term storage. High-resolution scans of printed documents are rarely needed at their original resolution — a 300 DPI scan of an A4 page can be reduced to 72 DPI for screen viewing without any meaningful loss of readability. Batch processing these files to a standardized archive format and resolution can reduce storage costs dramatically while keeping the documents easily accessible.
Step-by-Step: How to Batch Resize Images Without Any Software
The process is straightforward, but doing it correctly requires understanding a few key decisions you will make along the way. Here is a practical walkthrough using a browser-based batch resizing tool.
Step 1: Gather and Organize Your Source Images
Before you upload anything, spend a few minutes organizing your source files. Create a dedicated folder for your input images and, if you are working with different image types, consider organizing them into subfolders by category. If all your images need the same output settings, you can process them as one batch. If product photos need 800×800 but blog header images need 1200×628, process them in separate batches with different settings. This organization step prevents mistakes and reduces the need to re-process files.
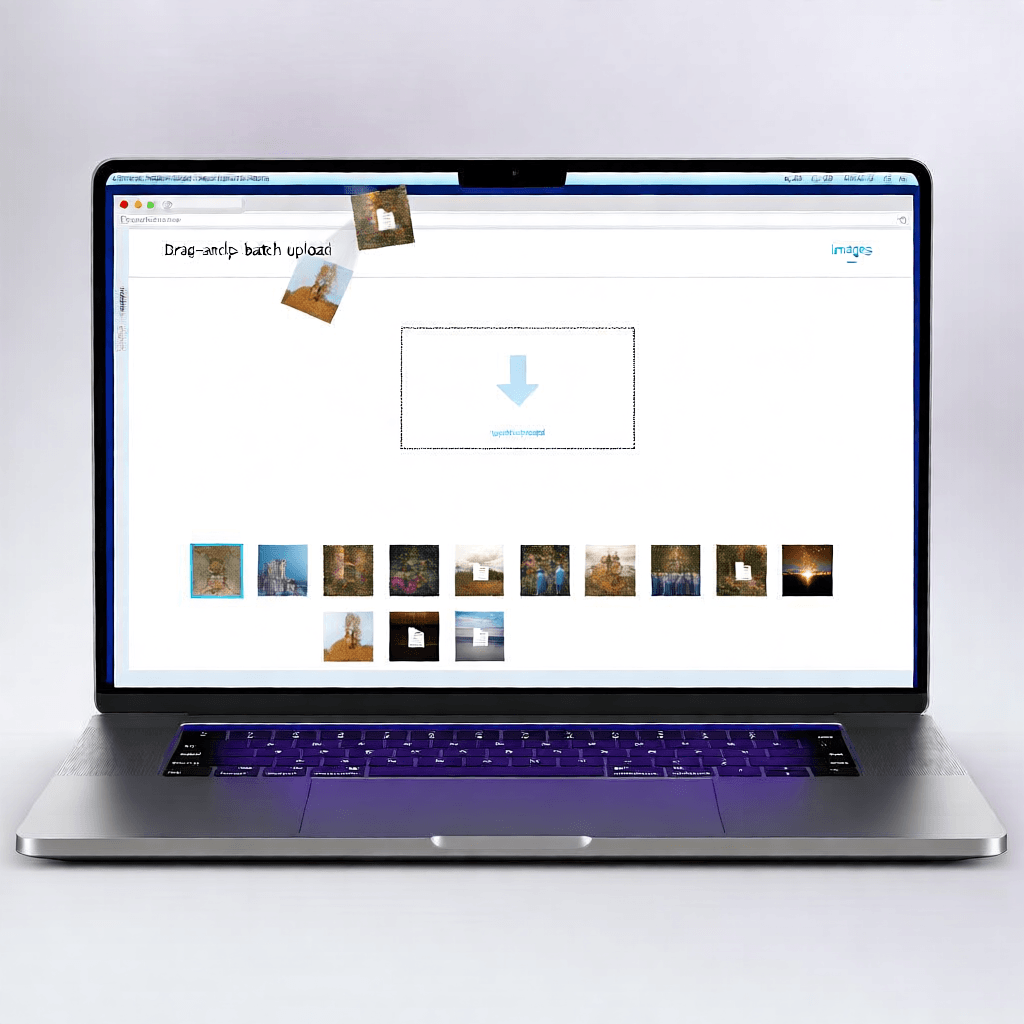
Step 2: Upload Your Images
Navigate to your chosen batch resizing tool and locate the upload area. The most user-friendly tools support drag-and-drop, allowing you to select files from your desktop and drop them directly into the browser window. You can typically select multiple files at once using your file browser’s multi-select functionality (Shift+Click or Ctrl+Click), or drag an entire folder.
Modern browsers can handle substantial batches, but there are practical limits. A batch of 50-100 images of 5-10 megabytes each is manageable. Larger batches — particularly with high-resolution source files — may slow down your browser or exhaust available memory. If you are working with thousands of images, split them into batches of 100-200 for processing. The time saved from batching still dwarfs the overhead of running a few batches instead of one.
Step 3: Configure Your Output Settings
This is the most important step, and the one most likely to trip up newcomers. You need to configure four key settings:
Dimensions: You can typically specify output by width, height, or both. For most use cases, specifying the maximum width (or height) and letting the tool preserve the aspect ratio is the safest approach. This prevents distortion. If you need exact dimensions — for example, if you are preparing profile pictures that must be exactly 400×400 — look for a tool that offers “fit,” “fill,” or “crop to fit” options.
Quality: JPEG quality settings typically range from 1 to 100. For web use, 75-85% is usually the sweet spot: file sizes are significantly reduced while visual quality remains excellent. Going below 60% produces visible artifacts on photographs. PNG is lossless, so quality does not apply, but you may have options for PNG compression levels.
Format: Choose your output format based on the use case. JPEG is ideal for photographs and web images where file size matters. PNG is better for graphics, screenshots, images with transparency, or cases where you need lossless quality. WEBP is an increasingly popular choice for web use — it produces significantly smaller files than JPEG at equivalent quality, and browser support is now essentially universal.
Naming: Some tools let you customize how output files are named. Adding a prefix or suffix (for example, “resized_” or “_web”) helps distinguish processed files from originals and makes it easier to sort through your files afterward.
Step 4: Preview and Process
Before committing to a large batch, process a sample of 3-5 images and examine the results carefully. Check for any signs of quality loss, incorrect cropping, or unexpected behavior. Pay particular attention to images with text, fine lines, or complex patterns — these are where resizing artifacts are most visible. Once you are satisfied with the sample results, run the full batch.
Step 5: Download and Verify
Most batch resizing tools offer individual downloads or a combined ZIP archive. For large batches, the ZIP download is far more convenient. After downloading, spot-check a random selection of your output images: verify dimensions, check for quality issues, and ensure the naming convention is consistent. If everything looks correct, you are done. If not, adjust your settings and re-process — batch processing means re-running is fast and cheap.
How to Preserve Image Quality When Batch Resizing
Quality preservation is the question I get asked about most often, and the answer is more nuanced than a simple “it depends.” There are specific, actionable things you can do to maintain quality during batch resizing.
The most important principle is to avoid upscaling. When you resize an image to dimensions larger than its original, the software must invent new pixels to fill in the gaps — a process called interpolation. No interpolation algorithm, no matter how sophisticated, can create information that was not there to begin with. The result is always a softer, less detailed image. Always work from your highest-resolution original, and resize downward to your target dimensions, never the other way around.
When downscaling, use a high-quality interpolation algorithm. The Lanczos algorithm (used by most image processing libraries) produces sharp, clean results when reducing image size. Bilinear and bicubic interpolation are faster but can produce slightly softer results. For most web use cases, the difference between algorithms is imperceptible at 80-90% quality settings, but for print or large-format display, the sharper algorithm matters.
Pay attention to output format and compression. JPEG compression is lossy — every time you save a JPEG, some data is discarded. If you resize an image and save it as JPEG, then later resize and save again as JPEG, you are compounding compression loss. For images that will go through multiple processing stages, use PNG or TIFF for intermediate steps, and only convert to JPEG for the final output. This is called a non-destructive workflow and is standard practice in professional photography.
Finally, test your quality settings before committing to a large batch. Save one processed image and open it side-by-side with your original at 100% zoom. On a calibrated monitor, you can clearly see whether your quality setting is appropriate. For web use, you are generally looking for results that look crisp on both desktop monitors and mobile devices, without obvious compression artifacts or blur.
Common Mistakes to Avoid in Batch Image Resizing
Even with the best tools, certain mistakes are surprisingly common. Avoiding them will save you time and protect your image quality.
Forgetting to preserve aspect ratio. This is the most frequent error. If you enter both width and height without maintaining aspect ratio, your images will be stretched or squashed. Unless you are preparing images for a fixed-size grid where distortion is acceptable (and it rarely is), always preserve aspect ratio. Use the “longest side” or “width only” approach to let the tool calculate the other dimension automatically.
Processing at the wrong quality level. Setting JPEG quality to 30% to minimize file sizes is tempting, but the resulting images will look terrible — blocky compression artifacts, smudged details, and color banding are all common at very low quality settings. For most web use cases, 75-85% is the minimum acceptable quality. If file size is a serious concern, resize to smaller dimensions first; the file size reduction from resizing is almost always greater than the reduction from aggressive compression.
Not testing on a sample first. Running a batch of 200 images with the wrong settings means you have 200 images to re-process. Always run a small sample first, inspect the output critically, and only proceed with the full batch when you are satisfied.
Mixing portrait and landscape images without planning. If you have a batch of mixed orientation images and you want them all at a specific size (say, 800×800), the tool must either crop, pad with background color, or distort some of them. Decide on your strategy before processing. Cropping to a center crop is usually the cleanest solution, but only if you have checked that your images’ subjects are near the center. Images with subjects at the edges will lose important content.
Ignoring original file formats. If your source images are in different formats (JPEG, PNG, RAW, TIFF), be aware that converting between them during resizing can introduce unexpected changes. PNG to JPEG conversion, for instance, discards transparency information and can alter colors. Batch converting from mixed formats to a single output format requires careful attention to how each format handles the transition.
Browser-Based Processing: Privacy and Security Considerations
Understanding where your images are processed is increasingly important as awareness of data privacy grows. When you use a batch resizing tool, you should understand whether images are processed locally (in your browser) or uploaded to the tool’s servers.
Tools that process images in your browser use JavaScript and the Canvas API to manipulate image data directly on your device. Your original files never leave your computer. This is the gold standard for privacy — it is technically impossible for the service operator to access your images because they are never transmitted. For photographers, healthcare workers, legal professionals, or anyone handling sensitive imagery, this local processing model is essential.
Cloud-based tools work differently: your images are uploaded to the service’s servers, processed there, and then returned to you. Even reputable services have had security incidents, and the terms of service for some tools may permit the use of uploaded images for purposes like model training or service improvement. Always read the privacy policy, and when in doubt, choose a tool that clearly states it processes images locally. ZizzleUp’s batch resizing tool processes images in your browser, meaning your photos stay on your device throughout the entire process.
There is also the matter of network dependency. Browser-local tools work offline once the page is loaded, making them reliable in situations with limited or no internet connectivity. Cloud tools require a stable connection throughout the processing period, which can be a significant limitation if you are working in areas with poor connectivity or processing very large batches where the upload/download time becomes a bottleneck.
Automation Possibilities with Browser-Based Image Processing
For users with technical familiarity, there are ways to extend browser-based batch resizing into a more automated workflow. Bookmarlet-based tools, browser extensions, and even simple scripts can automate common patterns. A bookmarklet — a small piece of JavaScript saved as a browser bookmark — can be configured to open a batch processing tool with specific pre-set dimensions, saving you from entering the same values repeatedly.
For developers, the underlying technologies used by browser-based image tools are accessible to anyone. The Canvas API can be called from JavaScript, and libraries like pica or browser-image-compression provide high-quality Lanczos and bilinear resampling directly in the browser. If your workflow involves processing images from a web application — for example, an internal tool for a marketing team — you can build a custom front-end using these libraries with zero server dependencies.
Power users also benefit from combining batch resizing with other browser-based tools in sequence. Resize your images, then pipe them to a compression tool, then convert formats, then apply watermarks — all without leaving your browser and all without any of your images ever touching a server. This modular approach to image processing gives you flexibility without sacrificing security.
Batch Resizing FAQ: Expert Answers to Common Questions
How many images can I resize at once in a browser-based tool?
Most browser-based batch resizing tools handle 20 to 50 images comfortably in a single batch. The exact limit depends on the tool’s implementation and your computer’s available memory. Some tools use chunked processing to handle larger batches without crashing your browser. As a practical rule, if you are processing more than 100 images, consider splitting them into multiple batches of 50-80 images each. This keeps processing responsive and makes it easier to spot-check results in smaller groups. For very large jobs (thousands of images), run batches in sequence rather than all at once.
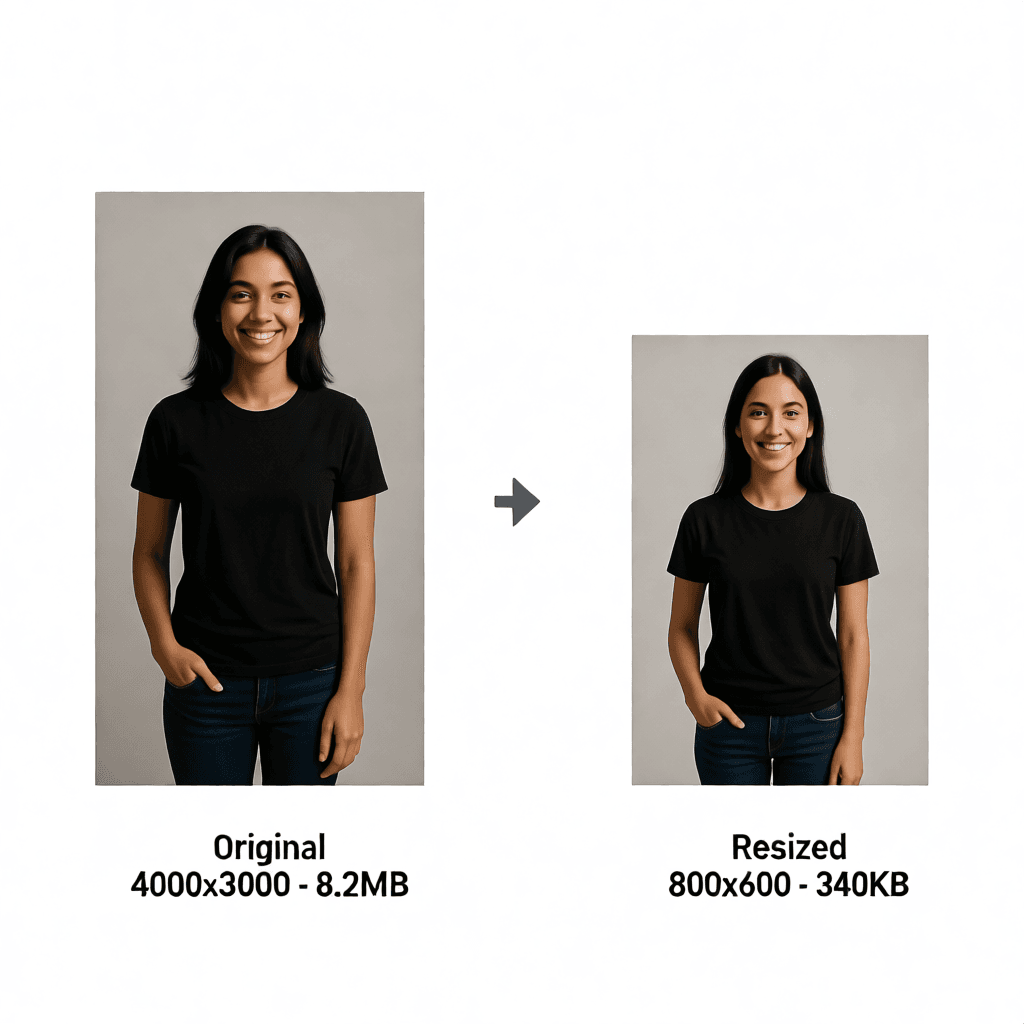
Does batch resizing reduce image quality?
Downscaling (reducing image size) from a high-resolution original to a smaller size can actually preserve quality quite well — you are discarding information that would not be visible at the reduced size anyway. The more important factor is your output format and quality settings. Saving as JPEG at 80% quality produces excellent results; saving at 40% introduces visible artifacts. Upscaling (making images larger than the original) always reduces quality because the software must generate new pixels. The best practice is always to work from your highest-resolution source and resize downward only.
Can I resize images to exact dimensions without distortion?
Yes, but it depends on the fit mode the tool provides. Most batch resizing tools offer several approaches: “fit within” (resize to fit within your target dimensions, preserving aspect ratio, resulting in a smaller image than specified if the aspect ratios differ), “fill” or “crop” (resize and crop to exactly your target dimensions, losing some edge content), and “stretch” (resize to exactly the specified dimensions without preserving aspect ratio, which causes distortion). For most use cases, “fit within” or center-cropped “fill” produces the best results. Always check what fit mode your tool uses as the default.
Do I need to install any software for batch processing?
No — browser-based tools like ZizzleUp’s batch resizing tool require nothing to install. You open the tool in your browser, upload your images, configure your settings, and download the results. The processing happens on your device (or, for cloud tools, on their servers). This makes browser-based batch processing accessible from any computer, tablet, or phone with a modern web browser, without requiring administrator access or software installation permissions.
What image formats can I process in a batch?
Most batch resizing tools support JPEG, PNG, GIF, WEBP, BMP, and TIFF as input formats. Support for output formats varies — the most common outputs are JPEG, PNG, and WEBP. Some tools also support PDF input and output, which is useful for document workflows. If you are working with RAW camera formats (CR2, NEF, ARW), you will need to convert them to a standard format like JPEG first using a RAW converter. Popular RAW processing tools like Darktable or Adobe Lightroom can handle batch RAW conversion before you use a browser-based resizing tool.
How do I resize images for specific social media platforms?
The key is to know each platform’s preferred dimensions and aspect ratios. Rather than guessing, use a tool with preset dimensions for common social media sizes, or keep a reference handy. Facebook link previews: 1200×630. Instagram square: 1080×1080. Instagram portrait: 1080×1350. Twitter posts: 1600×900. LinkedIn posts: 1200×627. YouTube thumbnails: 1280×720. Pinterest pins: 1000×1500. When preparing images for multiple platforms from a single source, batch processing with multiple preset sizes in sequence is far more efficient than processing for each platform separately.
Can I batch resize images on my phone or tablet?
Yes, most modern browser-based batch resizing tools work on mobile devices. The experience on touch devices has improved dramatically as browsers have added support for the File System Access API and improved handling of file inputs on mobile. On iOS, you can select photos from your camera roll directly in the browser. On Android, the same applies. Mobile processing is particularly useful for quick tasks — resizing photos from a phone camera before attaching them to an email, for example — but for large batches, a desktop browser with a physical keyboard and mouse remains more efficient.
What is the difference between resizing and resampling?
In casual usage, these terms are often used interchangeably, but they refer to slightly different concepts. Resizing simply changes the pixel dimensions of an image without changing the visual content — think of it like stretching or shrinking the image. Resampling, technically, is the process of recalculating pixel values when changing dimensions, using an interpolation algorithm to determine what color each new pixel should be. All image resizing involves resampling; the quality of the resampling algorithm is what determines how sharp and accurate the resized image looks. Modern tools use sophisticated resampling algorithms that produce far better results than the simple nearest-neighbor or bilinear interpolation of older software.
Summary
Batch image resizing is one of those skills that, once mastered, permanently changes how you approach any project involving images. The time savings compound over every project, every campaign, every product launch. Whether you are processing 10 images or 10,000, the principles remain the same: organize your sources, choose appropriate dimensions, test before committing, preserve quality settings, and respect the privacy implications of your chosen tool.
Browser-based tools have reached a point where they are genuinely competitive with desktop software for the vast majority of resizing tasks. They are free, require no installation, work on any device, and process images locally — protecting both your privacy and your workflow’s portability. Tools like ZizzleUp’s batch resizing tool handle the technical complexity while giving you full control over dimensions, quality, and output formats.
If you are currently processing images one by one, now is the time to stop. Batch processing is faster, more consistent, and far less mentally taxing. The next time you face a folder of images that need resizing, open a browser-based tool, drag your files in, set your parameters, and watch the work complete in seconds. Your future self will thank you for the time you saved — and the hours you reclaimed for work that actually matters.