Compressing PNG Files with Transparency – Best Practices
PNG files with transparency are everywhere on the modern web. From logos layered over photographs to icons with soft drop shadows, transparent PNGs make visual design flexible and polished. But that flexibility comes at a cost: PNG files with alpha channels are consistently larger than their opaque counterparts, and optimizing them without destroying that precious transparency is genuinely tricky.
This guide is the complete manual. We cover exactly why transparency makes PNG compression harder, the technical differences between PNG-8, PNG-24, and PNG-32, both lossy and lossless optimization strategies, practical workflows you can apply today, and the emerging alternatives that may soon replace PNG altogether. If you are running a website and fighting to keep page speeds fast while keeping beautiful transparent graphics, this is exactly what you need.
Understanding PNG Transparency and the Alpha Channel
To compress transparent PNGs effectively, you first need to understand what you are actually compressing. The PNG format supports multiple color modes, and the way it handles transparency varies significantly between them.
The alpha channel is the key to understanding PNG transparency. In computer graphics, an alpha channel stores an additional value for each pixel that represents that pixel’s opacity on a scale from 0 (fully transparent) to 255 (fully opaque). Unlike GIF’s binary transparency, which can only be on or off, PNG’s alpha channel allows partial transparency. A pixel can be 50% visible, 25% visible, or any value in between.
This partial transparency is what makes PNG so powerful for design. You can create soft gradients at the edges of a logo, simulate realistic drop shadows that blend naturally with any background, and composite multiple images together without hard edges. Each of those alpha values needs to be stored and compressed, and that is where the file size problem begins.
A standard PNG stores color data in one of three main modes. RGB mode uses 24 bits per pixel (8 bits each for red, green, and blue). RGBA mode adds an 8-bit alpha channel, bringing the total to 32 bits per pixel. Palette (indexed) mode uses a color lookup table and stores only 1 to 8 bits per pixel for color, with an optional 1-bit or 8-bit alpha layer. The mode you choose has a dramatic effect on file size, and choosing the wrong mode is one of the most common mistakes people make when working with transparent images.
The PNG specification also defines two distinct transparency types. Type 0 stores raw transparency data as gray values, while Type 6 stores transparency as an alpha channel embedded within RGBA pixels. Most modern tools work with Type 6, but older editors sometimes generate Type 0 files, which can confuse compression tools and produce suboptimal results.
Why Transparency Makes PNG Compression Harder
If you have ever wondered why a transparent PNG is so much larger than a similar opaque image, the answer lies in how DEFLATE compression, the algorithm PNG uses, actually works.
PNG uses the DEFLATE algorithm, a combination of LZ77 (which finds repeated patterns) and Huffman coding (which assigns shorter codes to frequent values). DEFLATE excels at compressing data with lots of repeating sequences, but it struggles with continuous tone data that varies randomly. Here is where transparency creates a compounding problem.
When you add an alpha channel to an image, you are essentially doubling the data the compressor has to work with. A 24-bit color image has three channels. A 32-bit RGBA image has four channels. More channels mean less spatial redundancy for the LZ77 stage to exploit. Additionally, the alpha channel in images with soft gradients (like drop shadows) contains many intermediate values that do not repeat frequently, creating entropy that Huffman coding cannot compress efficiently.
The checkerboard problem compounds this further. In the original image data, pixels from the subject and pixels from the transparent background typically alternate patterns, especially in images with complex outlines like hair or tree branches. This interleaving of fully opaque and fully transparent pixels creates a highly irregular data pattern with almost no repetition, making even the best compression look inadequate.
Real transparency scenarios make things worse. A drop shadow from a UI element might have a 64-pixel-wide semi-transparent area. The alpha values in that shadow change gradually, producing a smooth gradient from opaque to transparent. These gradients, whether in the color channels or the alpha channel, do not compress well because each adjacent pixel has a slightly different value. The result is that a subtle drop shadow on a small icon can easily add 30–50 KB to a file that could otherwise be under 10 KB.

PNG-8 vs PNG-24 vs PNG-32: Which Format Should You Use?
Choosing the right PNG color mode is the single most impactful decision you will make for file size. Understanding the differences between PNG-8, PNG-24, and PNG-32 is essential for any serious optimization workflow.
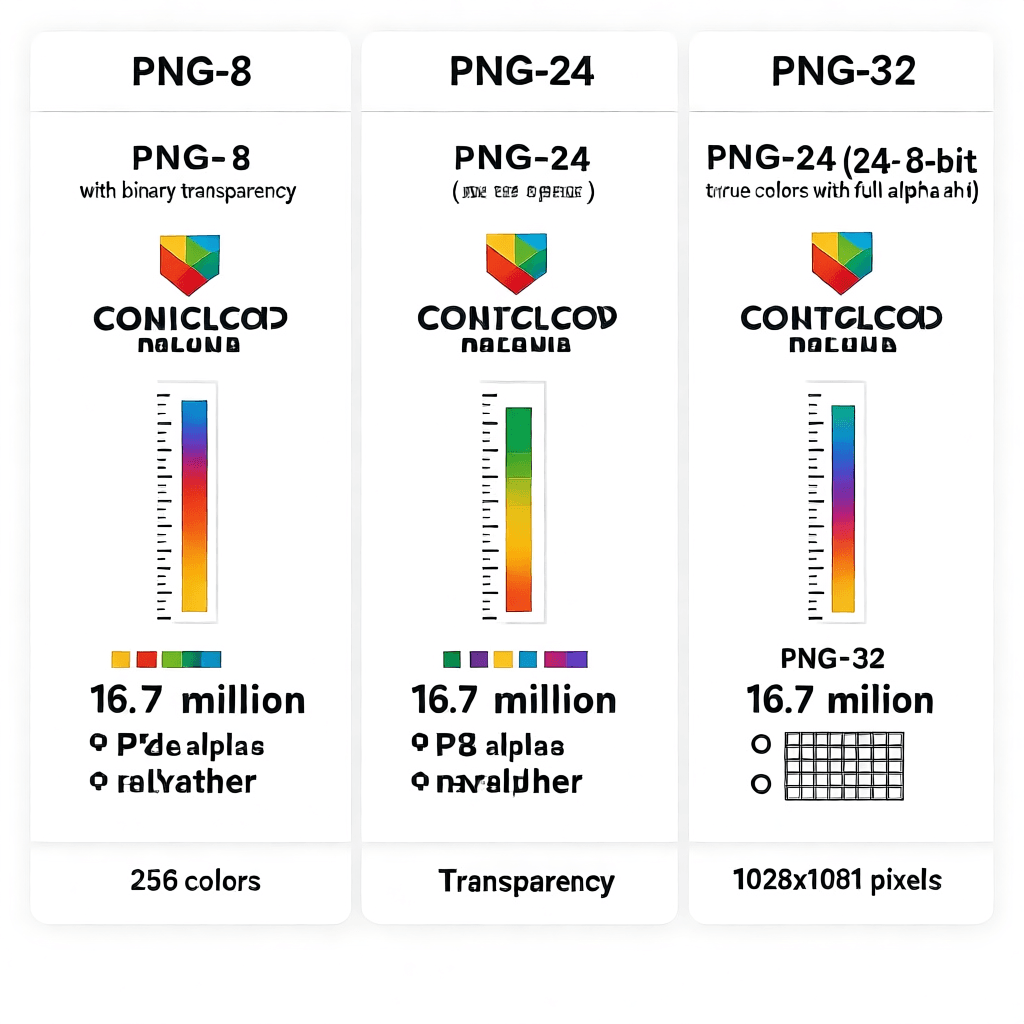
PNG-8 is an indexed color format. It stores images with a maximum of 256 colors using a palette (lookup table). When you save as PNG-8, the image analyzer quantizes your image, picking the 256 most representative colors and storing only those. PNG-8 can also include binary transparency (one fully transparent color from the palette) or a 1-bit alpha layer. This makes it ideal for simple graphics like icons, logos with flat colors, and UI elements with no gradients. File sizes are dramatically smaller than true color formats. A simple icon that might be 50 KB in PNG-32 can often be reduced to 5–10 KB in a well-optimized PNG-8.
PNG-24 is true color without an alpha channel. It stores 16.7 million possible colors per pixel and is suitable for photographs and complex gradients. Because there is no transparency, PNG-24 files are still smaller than PNG-32 equivalents, but they cannot be used where transparency is needed. For opaque images, PNG-24 is usually the better choice than PNG-32, since the alpha channel would simply waste space.
PNG-32 is true color with an 8-bit alpha channel. This is the format most people mean when they talk about transparent PNGs. It stores 16.7 million colors plus 256 levels of transparency for each pixel. PNG-32 is necessary for any image with smooth alpha gradients, soft shadows, anti-aliased edges against variable backgrounds, or semi-transparent overlays. The cost is significant: PNG-32 files are the largest of the three formats and compress the worst.
The practical decision framework is straightforward. If your image has no transparency and uses flat colors or simple graphics, PNG-8 is almost always the right choice. If your image has no transparency but contains complex color variation like a photograph, PNG-24 is appropriate. If your image requires smooth semi-transparency, soft edges, or alpha blending, you need PNG-32, and you should then apply every optimization technique in this guide to keep the file as small as possible.
Lossy vs Lossless PNG Compression Explained
Most developers are familiar with the lossy versus lossless distinction from JPEG versus PNG comparisons. But within PNG itself, both lossless and lossy approaches exist, and understanding when to use each is crucial for effective optimization.
Lossless PNG compression preserves every pixel exactly. When you save a PNG, the DEFLATE algorithm compresses the raw pixel data without discarding any information. Opening and re-saving a lossless PNG produces a byte-identical file. This is essential for images that will be edited repeatedly, since lossy compression artifacts accumulate with each save.
Within lossless optimization, several techniques dramatically improve compression without changing pixel values. Filter optimization tests different DEFLATE preprocessing filters (None, Sub, Up, Average, Paeth) for each scanline and applies the best one. This alone can reduce file size by 10–30%. Zlib compression level tuning adjusts the balance between compression speed and compression ratio. Levels 6–9 produce significantly smaller files than the default level, at the cost of longer processing time. Chunk stripping removes optional PNG chunks like tIME (last modification time), tEXt (text metadata), and iTXt (internationalized text) that add no visual value.
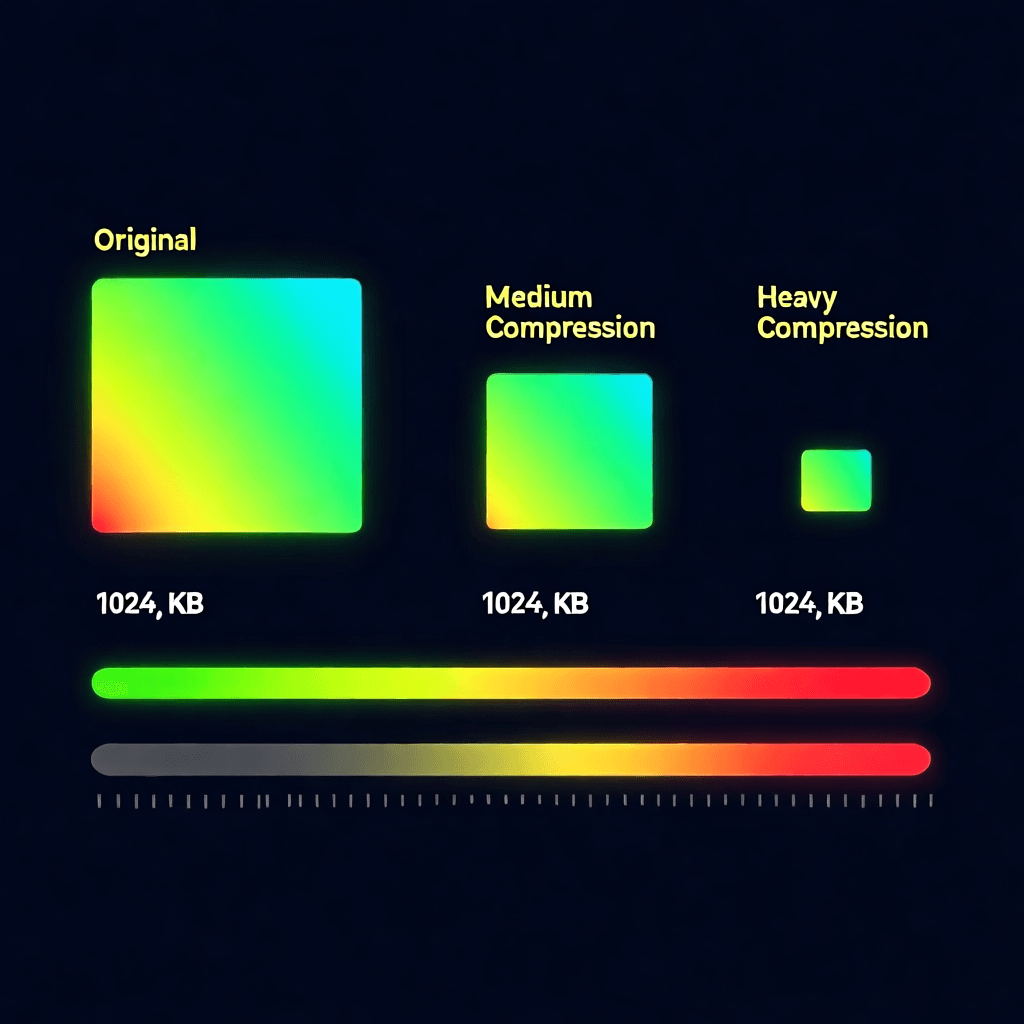
Lossy PNG compression actively reduces visual quality to achieve smaller files. These techniques should be used carefully and always reviewed visually before deployment. Posterization reduces the number of distinct color values, combining similar colors into shared palette entries. A 24-bit image with thousands of similar shades can be reduced to hundreds without visible difference. Alpha channel reduction lowers the number of transparency levels from 256 to 64, 32, 16, or fewer. Since human vision is less sensitive to transparency variations than color variations, reducing alpha levels often produces no perceptible change. Color quantization applies dithering patterns to simulate smooth gradients with fewer palette entries, which can work well for flat-style graphics but risks a messy result for photographic content.
The best workflow combines both approaches strategically. Start with lossless optimization using tools like OptiPNG or PNGCrush to get the maximum lossless reduction. Then, if the file is still too large, apply lossy techniques incrementally, checking the visual result at each step. Never apply lossy compression before finishing all your image editing, because re-compressing a lossy-compressed image compounds artifacts.
Color Quantization and Dithering Strategies
When converting true color images to indexed PNG-8, color quantization is the process that determines how your 16.7 million possible colors get mapped to a maximum of 256. Doing this well is equal parts science and art, and the difference between a naive quantizer and a good one can double or halve your file size.
Naive quantization algorithms simply sample every nth pixel and build a histogram. This produces a palette of the most frequent colors but often misses important subtle colors that appear infrequently. Better algorithms like median cut, octree quantization, and neural-network-based quantization consider spatial distribution and attempt to preserve visually important colors even if they are statistically rare.
Dithering is what happens when your image contains a color that is not in your palette. Instead of approximating with the nearest palette color, a dithering algorithm alternates between nearby palette colors in a pattern that, to the human eye, creates the illusion of the missing color. Floyd-Steinberg dithering distributes the quantization error to neighboring pixels and produces the most natural-looking results for photographic content. Ordered dithering uses a fixed pattern matrix and produces a characteristic crosshatch appearance. Diffusion dithering uses a serpentine pattern and works well for large solid areas.
For transparent PNGs, dithering requires extra consideration. The alpha channel adds another dimension to quantization, and naive approaches often dither the color channels independently from the alpha channel, creating misalignment artifacts at semi-transparent edges. A properly designed quantization for transparent images should consider RGBA as a four-dimensional space, ensuring that dithering patterns align at transparency boundaries.
In practice, for most web graphics work, you should avoid dithering on PNG unless you have a specific reason to use it. Modern displays render smooth gradients reasonably well with a decent 256-color palette, and avoiding dithering keeps the file smaller and cleaner. Reserve dithering for cases where you need to preserve a specific gradient that the palette genuinely cannot represent.
Alpha Channel Optimization Techniques
Since the alpha channel is the primary driver of large file sizes in transparent PNGs, optimizing it specifically often produces the biggest wins. Here are the techniques that matter most.
Reduce alpha bit depth deliberately. PNG supports storing the alpha channel at any bit depth from 1 to 16 bits. By default, most tools store 8-bit alpha (256 levels), but many images look visually identical with 4-bit alpha (16 levels) or even 2-bit alpha (4 levels: fully transparent, 66% transparent, 33% transparent, fully opaque). Test your specific images to find the threshold where reducing alpha levels becomes visible. For simple icons and logos, 2–4 bit alpha is often sufficient.
Separate and threshold unnecessary transparency. If parts of your image are either fully opaque or fully transparent with no intermediate values, converting those intermediate values to either 0% or 100% opacity can significantly improve compression. This “thresholding” operation removes the gradient data that DEFLATE struggles to compress.
Use alpha pre-multiplication. In standard RGBA storage, each pixel stores its red, green, and blue values independently of the alpha value. In pre-multiplied alpha, the color values are already scaled by the alpha value. This means fully transparent pixels have all color values set to zero, which compresses better because there is more repetition in the data.
Many PNG compression tools automatically apply this transformation during optimization, but if you are writing custom processing tools, pre-multiplying alpha before saving and de-multiplying after reading ensures both correct rendering and better compression.
WebP and AVIF as Alternatives to Transparent PNGs
PNG was invented in 1996, and while it remains a workhorse format, modern alternatives offer genuine improvements for most use cases. If browser compatibility allows, these formats deserve serious consideration.
WebP was developed by Google and supports both lossy and lossless compression with full alpha channel transparency. For transparent images, WebP typically achieves 25–35% smaller file sizes than PNG at equivalent visual quality. The lossy WebP mode is particularly effective at compressing the smooth gradients common in alpha channels. WebP has excellent browser support, covering over 97% of users globally as of 2026. You can use WebP on zizzleup.com with our image compression tool which handles WebP conversion automatically.
AVIF, the image format derived from the AV1 video codec, offers even better compression than WebP for many image types, including transparent images. AVIF supports full alpha channel transparency with lossy compression that frequently produces files 50% smaller than equivalent PNGs. Browser support for AVIF is now solid across Chrome, Firefox, and Safari (since Safari 16). For sites targeting modern audiences, AVIF is increasingly the default choice.
The fallback strategy for modern image delivery is to use the picture element with multiple source formats. Serve AVIF to browsers that support it, WebP as a secondary option, and PNG as the final fallback. This approach, sometimes called “progressive enhancement for images,” ensures every visitor gets the fastest possible image while maintaining full compatibility.
For transparency specifically, AVIF’s encoding of semi-transparent regions is remarkably efficient. The codec was designed with video in mind and handles smooth gradients across both time and space much better than block-based older formats. A complex semi-transparent drop shadow that would be tens of kilobytes in PNG can often be under 5 KB in AVIF at equivalent visual quality.
Practical Use Cases: Logos, Icons, and UI Elements
Different image types require different optimization strategies. Here is how to approach each common use case for transparent PNGs on the web.
For logos used across a website, PNG is still frequently the right choice, particularly when you need to support older browsers or when the logo has complex gradients or effects that SVG cannot reproduce. Optimize logos by first checking whether PNG-8 with binary transparency is visually acceptable. Many simple logos lose nothing in this conversion and gain dramatically smaller file sizes. For logos with subtle anti-aliased edges, PNG-8 with a small alpha palette (4–8 levels) often works well. If the logo appears at multiple sizes, seriously consider SVG instead, which scales perfectly without any file size penalty.
For icon sets, PNG-8 is almost always the correct format. Icon sets benefit enormously from shared palettes, where multiple icons in the same set share the same color palette. When you save a folder of 20 icons as separate PNG-8 files, if they all use the same palette, each file is smaller, and some browsers and tools can optimize across the entire set. Consider tools like ImageAlpha or pngquant that are specifically designed for palette optimization of icon sets.
For UI elements like buttons with rounded corners and subtle shadows, PNG-32 is usually necessary for the smooth semi-transparent edges. However, many UI elements can be split into layered components. A button with a shadow and a gradient overlay might be better represented as two separate images: a flat PNG-8 button shape and a separate shadow image. This layering approach can dramatically reduce total file size.
For photographs with transparent backgrounds, the first question to ask is whether a transparent background is actually necessary. If the image sits on a solid color, you can often achieve a smaller result by flattening the background to that color and using JPEG or a heavily optimized PNG-24. Only use transparent PNG for photographs when the background genuinely varies.
Common PNG Transparency Mistakes and How to Avoid Them
After optimizing hundreds of transparent PNGs, certain mistakes appear repeatedly. Here is how to avoid the most common ones.
Saving as PNG-32 when PNG-8 would suffice is the single most frequent error. Before saving any transparent image in full 32-bit RGBA, check whether PNG-8 with binary transparency works visually. For most icons, simple logos, and UI elements, the difference is imperceptible and the file size savings are substantial.
Re-compressing images after lossy editing is another major issue. If you open a PNG, apply sharpening or color adjustments in Photoshop, and save again, you have lost quality even though you saved as PNG. Each round of editing and saving introduces rounding errors that accumulate. Keep your master files in an uncompressed format like PSD or TIFF, and only export to PNG when the image is final.
Not removing metadata is a small but entirely avoidable waste. Many image editors embed creation dates, software names, color profiles, EXIF data, and author information in PNG files. This metadata is useless for web display and can add 5–10 KB per image. Your compression workflow should always strip metadata before deploying.
Using the wrong export settings from design software is more common than people realize. Photoshop’s “Save for Web” defaults are not always optimal for transparency. When exporting for web, explicitly set the color mode to PNG-8 or PNG-32 as appropriate, disable any embedded color profile conversion that might add data, and check the actual bit depth of the alpha channel in the export dialog.
Finally, forgetting that PNG compression is not free. Tools like PNGOUT and OptiPNG that find the absolute smallest representation of an image can take seconds to minutes per image because they exhaustively test millions of compression parameter combinations. This is fine for final production files, but if you are processing hundreds of images, batch compression tools with sensible defaults are far more practical.
Recommended Tools for PNG Transparency Compression
A good toolchain makes PNG optimization much faster and more effective. Here are the best tools available for different workflows.
For automated compression, our image compression tool handles transparent PNGs as part of a broader workflow, automatically stripping metadata and applying lossless optimization. For batch processing, the command-line tools pngquant, OptiPNG, and PNGCrush are industry standards. pngquant converts true color PNGs to palette-based PNGs with a perceptually optimized color palette and configurable quality settings. OptiPNG attempts multiple compression strategies and selects the smallest result. PNGCrush offers a wide range of optimization options and can strip nearly all optional chunks from PNG files.
For lossy compression with transparency, the pngquant tool (mentioned above) actually produces lossy palette-based PNGs with optional alpha channel quantization. For macOS users, ImageOptim is a GUI application that runs many optimization tools with a single drag-and-drop interface. It handles transparency optimization automatically and shows before/after file sizes. For Windows, FileOptimizer provides similar functionality with broad format support.
For professional workflow integration, if you are working with large image sets in a continuous deployment pipeline, tools like Sharp (for Node.js) and Pillow (for Python) provide programmatic access to quantization and compression with full control over alpha channel handling.
Frequently Asked Questions
Does PNG compression lose quality?
Pure PNG compression using lossless modes (the default in most tools) does not lose any visual quality. The DEFLATE algorithm perfectly reconstructs the original pixel data. However, some optimization tools offer optional lossy modes that reduce quality to achieve smaller files. If you are using our compression tool, always check whether lossless or lossy mode is active and choose according to your quality requirements. For final production images, lossless is generally recommended unless file size is absolutely critical.
Can I convert transparent PNG to JPEG?
JPEG does not support transparency at all. If you convert a transparent PNG to JPEG, the transparent areas will be filled with a solid color (typically white), and semi-transparent pixels will be composited over that background color. This is sometimes acceptable for images that always appear on white backgrounds, but it eliminates the primary advantage of PNG transparency. For any situation where the background varies, JPEG is simply not an option. Use WebP or AVIF instead if you need both transparency support and better compression than PNG offers.
Why is my transparent PNG so large?
Large transparent PNG files are almost always caused by one of three issues. First, using PNG-32 (32-bit RGBA) when PNG-8 with reduced alpha levels would suffice. Second, the image has complex semi-transparent regions like soft shadows or hair outlines that inherently generate large amounts of data. Third, the image resolution is higher than needed for its display size. Check all three factors systematically: reduce color and alpha depth first, then consider whether the resolution can be lowered, and finally apply aggressive lossless optimization. In most cases, at least one of these will produce a significant size reduction.
Should I use PNG or WebP for transparent images?
For new projects where browser compatibility allows, WebP is generally the better choice. WebP with transparency typically produces 25–35% smaller files than equivalent PNGs at the same visual quality level. Both formats support full 8-bit alpha transparency. The main reason to stick with PNG is if you need to support Internet Explorer (which is now negligible in usage share) or if you are distributing images for use in environments outside of web browsers, where PNG remains the universal standard. For most modern websites, WebP should be your default for transparent graphics.
Can I reduce transparency levels without visible change?
Often yes, and this is one of the most effective optimization techniques. Human visual perception is far more sensitive to changes in opaque color than to changes in transparency level, particularly at very subtle values. Reducing 8-bit alpha (256 levels) to 4-bit alpha (16 levels) is visually imperceptible in most cases. Reducing to 2-bit alpha (4 levels) works well for simple icons and graphics with hard transparency boundaries. Gradients and smooth shadows are more sensitive and may show visible banding at very low alpha bit depths. Always test your specific images, and consider using a tool like pngquant which performs alpha quantization perceptually rather than simply truncating bits.
What is the best PNG compression tool?
For most users, our image compression tool provides the best balance of ease of use and compression effectiveness. For professionals who need maximum optimization, the combination of pngquant (for palette and alpha quantization) followed by OptiPNG or PNGCrush (for DEFLATE optimization) produces consistently excellent results. These tools are free and work on all major operating systems. If you are processing images programmatically, the Sharp library for Node.js provides excellent programmatic control over all aspects of PNG optimization including alpha channel handling.
How do I check if my PNG optimization actually preserved transparency?
The most reliable way is to open the optimized image in your browser and view it over a checkerboard pattern (which is the standard way transparency is visualized). Then view it over both white and dark backgrounds to confirm that alpha blending works correctly. For command-line verification, tools like pngcheck can validate the PNG structure, and you can use ImageMagick’s identify command to check the bit depth of both the color and alpha channels. Never skip the visual check, because subtle alpha channel corruption can produce artifacts that are invisible on a white background but glaringly obvious on a dark one.
Summary
Compressing PNG files with transparency requires understanding both the format’s technical limitations and the practical optimization techniques available. The alpha channel that makes PNGs so useful is also the primary driver of their file size, but smart choices about color mode, bit depth, and compression strategy can reduce file sizes dramatically without sacrificing visual quality.
Start every optimization by choosing the smallest color mode that preserves the visual quality you need. PNG-8 with reduced alpha levels works for most icons and simple graphics. Reserve PNG-32 for images that genuinely require smooth semi-transparency. Then apply lossless compression tools to reduce file size further without any quality loss. Only consider lossy compression after exhausting lossless options, and always verify results visually before deploying.
For most modern websites, WebP or AVIF will outperform PNG for transparent images and should be your first choice when browser compatibility permits. Keep PNG as a reliable fallback and for use cases where the format’s specific properties are genuinely needed. By following these practices, you can keep your transparent graphics looking beautiful while maintaining the page speed performance that both users and search engines expect.